Spacer Configuration Tool
This tool is accessed from the Duct Bank Routing Tool and provides option to configure the conduit spacer layout for a duct bank:
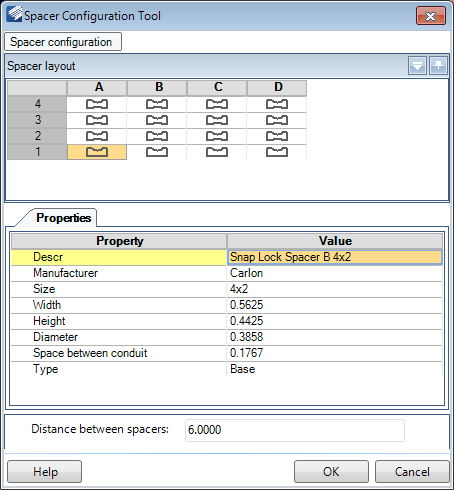
Spacer Configuration
Click the Spacer configuration icon at the top of the dialog to display the following drop down with options to configure the Spacer Layout grid:

| Setting | Description |
|---|---|
| Configuration | Enter a new configuration name or select an existing one from the list to define/modify the properties. Saved configurations can be used when configuring duct banks. |
| Setup Grid | Displays the
Setup Grid Dialog allowing you to define the setup of the
Spacer Layout grid.
Select the number of rows and columns for the grid and click OK. This defines the number of cable slots to be included in the duct bank. |
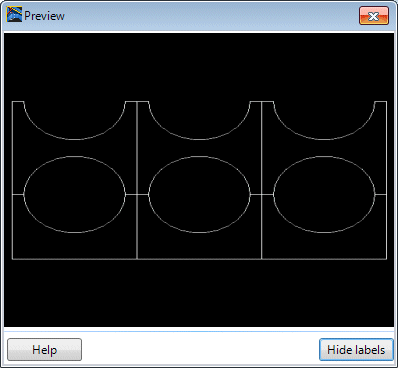
| Preview | Select to display a preview of how the defined grid setup will look: |
| Save | Saves changes made to the selected configuration. |
Spacer Layout
Properties
In the Properties section use the following fields to define properties for each of the conduit spacers.
| Setting | Description |
|---|---|
| Description | Select from the list of descriptions (which will also include the size). |
| Manufacturer | Select the manufacturer from the drop down list. The available options depend on the size and type. |
| Size | This field is directly related to the value selected in the Description field. Any size selected in either field will be reflected in the other. |
| Width | This field is automatically populated when a Description and Manufacturer value is defined. |
| Height | This field is automatically populated when a Description and Manufacturer value is defined. |
| Diameter | This field is automatically populated when a Description and Manufacturer value is defined. |
| Space between conduit | This field is automatically populated when a Description and Manufacturer value is defined. |
| Type | Define the type of spacer as either Base, or Intermediate. |